Espruino Pico: Javascript on a USB stick


The Espruino Pico is a micro-controller which runs JavaScript and has the size of a small USB stick. I backed this project end of last year on Kickstarter and this week I received my rewards. I have to say that the campaign was well organized and the pledges delivered on time. The project also has a website (www.espruino.com) where you can buy the old Espruino version and soon the Espruino Pico. The website offers a forum and a lot of tutorials too.
First I want to show you a picture so you can see how really small the Espruino Pico is.
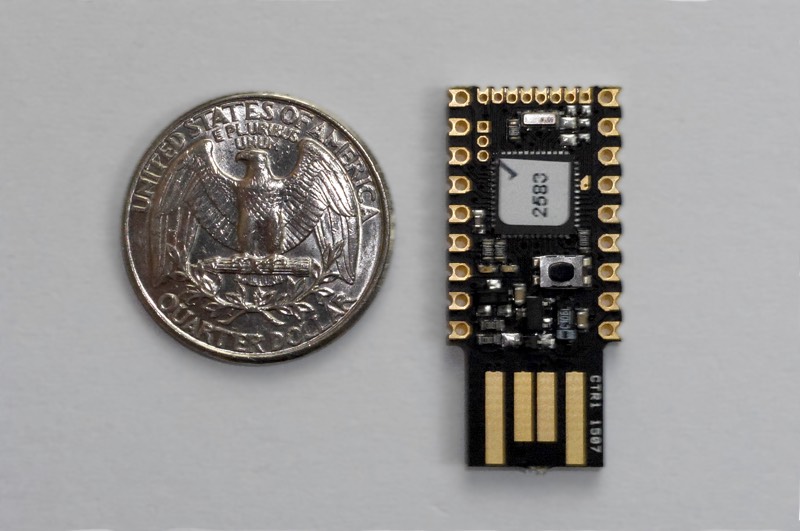
As you can see the Pico has a USB interface. The interface can be used to power the Pico and to run your programs. Additionally the Pico can also act as a USB keyboard or mouse which makes it perfect to develop PC gadgets.
Specifications:
- 33mm x 15mm (1.3 x 0.6 inch)
- STM32F401 CPU - ARM Cortex M4, 384kb flash, 96kb RAM
- 22 GPIO pins (21xPWM, 2xSerial, 3xSPI, 3xI2C, all 5V tolerant)
- Two on-board LEDs
- One on-board button
- USB type A connector (incl. additional USB pins on the back)
- Voltage regulator (3.5V-16V -> 3.3V)
Full specs and pin layouts are available on the official website: www.espruino.com/Pico.
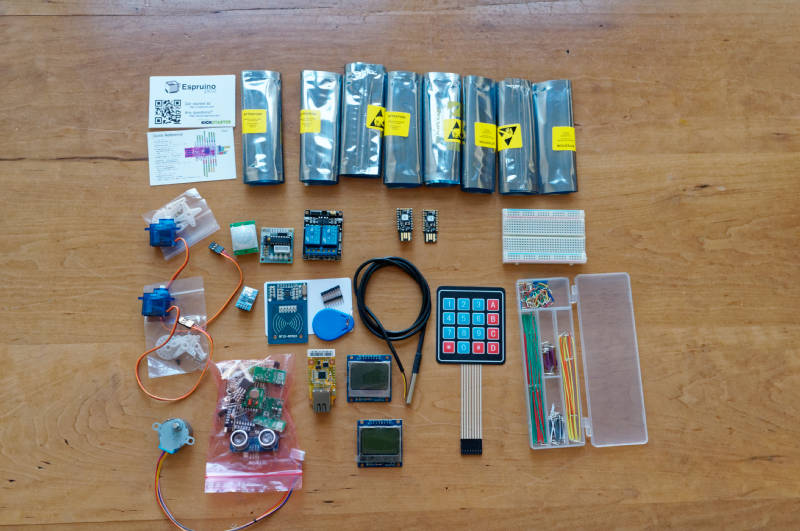
On Kickstarter, I did back the Ultimate Toy Kit pledge. It contains everything you possibly need to start prototyping:
- Espruino Pico (10x, two of them with pins)
- Breadboard & Jumper Wires
- Terminal Block
- PCD8544 LCD Screen (2x)
- WS2811 MultiColour LEDs (20x)
- 47uF Capacitor
- Double Relay Module with Jumpers
- Infrared Receiver (2x) & Infrared LED (4x)
- Red LED
- Resistors
- Light Sensor (LDR) (2x)
- Piezo Speaker
- Push Button (2x)
- Vibration Sensor (2x)
- 433Mhz Radio TX + RX (2x)
- DS18B20 Temperature Sensor
- Micro Servo Motors (2x)
- Pyroelectric Sensor
- HC-SR04 Ultrasonic Distance Sensor
- MFRC522 NFC
- FET & Stepper Motor
- ESP8266 WiFi
- WIZnet W550io Ethernet
- KeyPad
As you can see, its more than enough to keep busy on rainy weekends.
How to get started
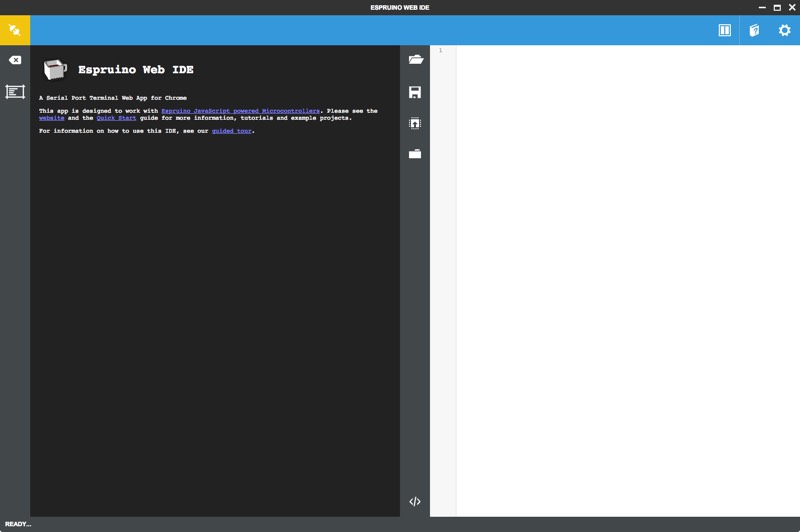
The Pico can be programmed with a WebIDE. It's a Chrome app and you can download it from the Google Chrome Store. As an alternative it is also possible to connect to the Pico using any terminal software.
Windows XP and 8.1 users need first to install a USB CDC driver (see official docu). Windows 7, Linux, and OSX users can continue without :).
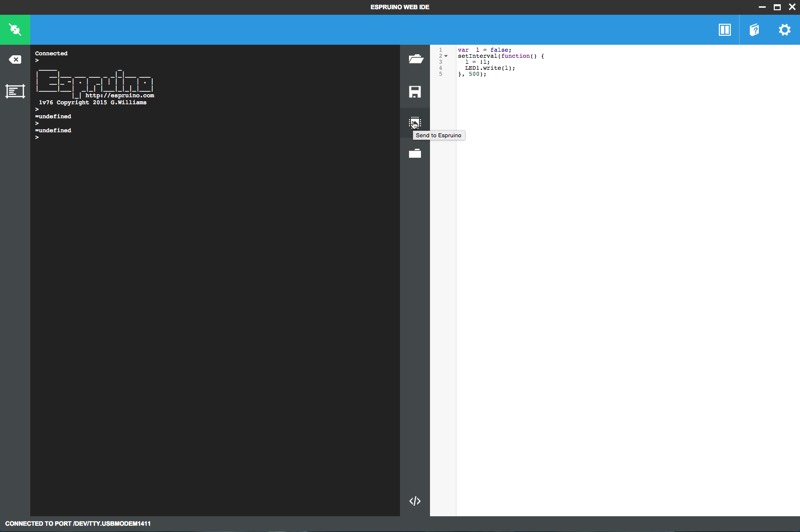
Once you started the WebIDE, plug-in the Pico to a free USB port. After that click on the yellow connect icon on the top-left corner.
A USB port select box will popup. Here you need to choose the right USB port on which you plugged-in the Pico. Usually, it's one of the ports starting with /dev/tty (on Linux/OSX).
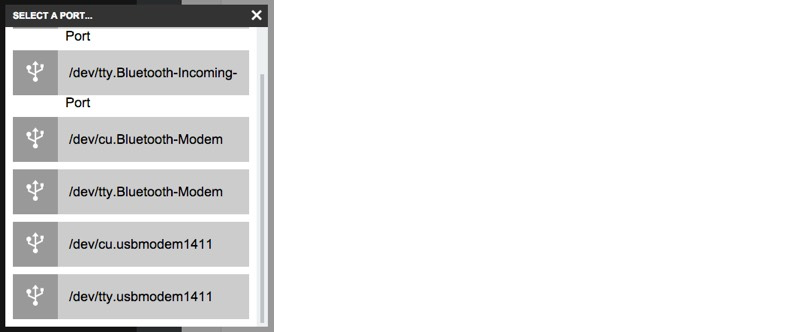
If you don't know which port number it is, I recommend clicking "connect" without the Pico plugged-in. Then click again on "connect" after the Pico is plugged-in. The new USB port entry in the list will be the Pico.
If everything went well the connect icon turns green and the terminal (black section) will show the welcome logo and firmware version.

Btw. with the build-in terminal you can run commands & JavaScript code directly on the Pico. For example type 1+2; and hit enter.

The source text area (white section) contains already a small sample program. The sample program will flash the red onboard led until you disconnect the Pico from the USB port. Let's run it to see if our Pico is working. Click on the button in the middle of the IDE as shown in the screenshot below.
During the next months, I will spend some time playing around with the Pico. Stay tuned for more blog articles about some of my Pico projects!